To identify your doorbell wiring, we should start by locating the transformer, usually found in a utility closet, basement, or attic. It converts high-voltage electricity to 16-24 volts AC. Next, we examine the chime, which typically has six wires (two red, two black, one yellow, one green) connected to specific terminals. Finally, we’ll trace the wires from the push button to the chime, verifying connections against manufacturer guidelines to confirm everything’s properly set up. There’s more to cover to guarantee full functionality.
Key Takeaways
- Locate the doorbell chime, typically containing multiple wires: two red, two black, one yellow, and one green.
- Identify the transformer, commonly located in a utility area and labeled with voltage output between 16-24 volts AC.
- Trace wires from the push button to the chime, ensuring connections correspond to labeled terminals for front and rear setups.
- Document wire connections, focusing on red and black pairs for the transformer and front terminals, aiding troubleshooting and clarity.
- Test voltage using a multimeter at the transformer and chime, confirming all connections are secure before restoring power to the system.
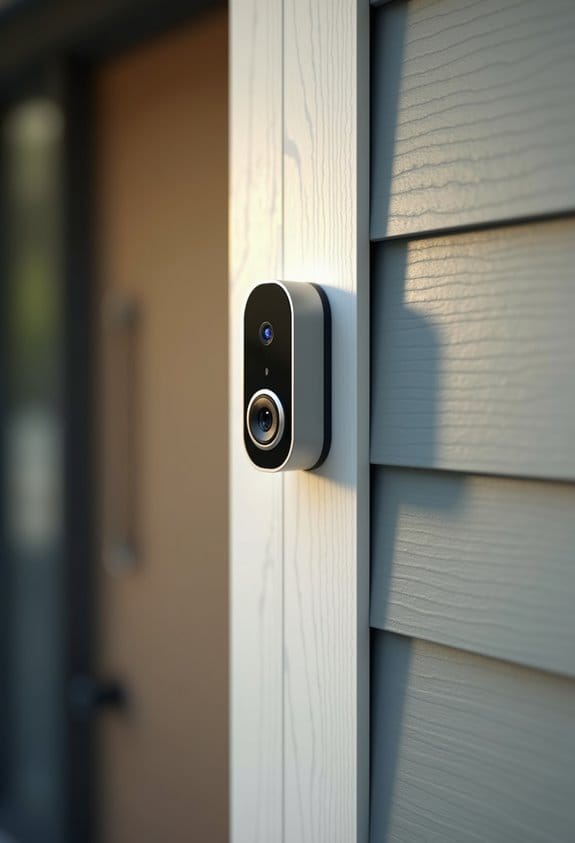
Understanding Your Doorbell System Components

When we look into our doorbell system components, it’s essential to break down how each part works together. A typical wired doorbell setup includes three main elements: the push button, the doorbell chime, and the transformer. The push button, usually mounted near your entrance, completes the electrical circuit upon being pressed. This sends a signal to the doorbell chime, which converts the electrical signal into sound. The chime is equipped with wiring connections, often organized by two sets of terminals for front and rear functionality. The transformer plays a significant role by reducing your home’s voltage to a safe level, usually between 16 and 24 volts AC, ensuring all components operate effectively. Understanding this doorbell wiring is important for troubleshooting or installation. It is also crucial to ensure that your transformer matches the voltage and wattage requirements of your doorbell system for optimal performance and safety.
Step-by-Step Guide: How to Locate Your Doorbell Transformer

Locating the doorbell transformer can feel challenging, especially if we aren’t familiar with our home’s electrical layout. Typically, we’ll find the doorbell transformer in a utility closet, basement, or attic. First, we should turn off the power supply at the circuit breaker for safety. Next, we look for a small box that converts high-voltage electricity to 16-24 volts AC, essential for powering our doorbell system. The transformer may have a label indicating its voltage output on the front or side. As we inspect the wiring, we can follow the red and black wires leading from the transformer. These usually connect to the doorbell chime and button, helping us trace our setup effectively. For added safety during inspection, consider using a non-contact voltage tester to detect live wires without direct contact.
How to Identify Your Doorbell Chime and Its Wiring?

After locating the doorbell transformer, we need to focus on identifying the doorbell chime and its wiring. Typically, our chime will have six wires: two red, two black, one yellow, and one green. The red and black wires connect to the front terminal and the transformer. We should check the connections at the top terminal, where the red/black pair usually connects, while the yellow and green wires often connect to the bottom terminals for various setups. Documenting each wire’s location will help us troubleshoot any issues later. Remember, if we find different colors, they could serve different purposes, so always verify against the manufacturer’s guidelines for proper connections. Considering the installation methods of your doorbell mount can also impact wiring accessibility and maintenance.
Tracing Wires From Your Push Button to the Chime
To begin tracing wires from your push button to the chime, it’s essential to turn off the power supply to prevent any electrical hazards. Start by carefully removing the doorbell button from the wall. You’ll likely see two wires, often red and white, connected to the button. Follow these wires as they lead toward the chime box within your home. At the chime, check for labeled terminals—typically, Front, Rear, and Trans. Confirm that the wires from your button connect to the appropriate terminal. It’s wise to document these connections, ensuring clarity for future installations or troubleshooting. This process may seem tedious, but it’s vital for maintaining your doorbell system’s functionality and safety. Always use an electrical tester to verify the absence of power before handling any wiring.
What Your Doorbell Wiring Should Look Like
When we visualize a typical doorbell wiring setup, it’s important to understand how each component interacts to create a functional system. Our setup usually consists of three main elements: the transformer, the push button(s), and the chime box. The transformer connects to the electrical system, featuring a power terminal (often red) and a ground terminal (commonly black). When we press the front or rear buttons, the energized red wire activates the system. The chime box includes several wires—red, black, yellow, and green—that connect everything together. To guarantee safety and cleanliness, we should securely cap any excess wires, like yellow and green, to prevent shorts or exposure. This configuration allows for seamless doorbell operation. It is also essential to verify transformer compatibility with your doorbell model, ensuring the appropriate voltage and current rating for reliable performance.
Common Issues With Doorbell Wiring and How to Fix Them
Several common issues can arise with doorbell wiring, leading to frustrating malfunctions or complete system failures. We often encounter disconnected or damaged wires that can prevent the doorbell from ringing. Let’s also check the connections at the chime and transformer, as improper connections can lead to chime failures. Additionally, voltage fluctuations from overheating transformers may damage components, so we should monitor their temperature during use. Wire caps should be securely placed over unused wires in the chime box to avoid short circuits. Regularly testing the doorbell functionality after any installation or adjustments helps guarantee all components work effectively, allowing us to spot wiring issues early and maintain reliability in our doorbell systems. Choosing a transformer with UL certification helps ensure safety and reduces the risk of electrical hazards in your home.
Essential Tools for Identifying Doorbell Wiring
Identifying doorbell wiring can seem challenging, especially if we’re not equipped with the right tools. A multimeter is essential for measuring voltage across wires, which helps us determine the connections to the doorbell, transformer, and chime. It’s vital to understand the color-coding: red usually indicates the transformer connection, while white or other colors may denote front or rear buttons. Labeling wires during removal aids in reconnecting everything correctly. Additionally, a wire tracer simplifies our task by detecting wire paths within walls, eliminating the need for invasive probing. For clearer understanding, consulting wiring diagrams specific to our doorbell model can greatly assist in identifying wire functions and positions, reducing our overall frustration in this process. Ensuring your transformer matches the power and voltage requirements of your doorbell system is crucial for proper function and safety.
Safety First: Precautions Before Working on Doorbell Wiring
Before we start working on doorbell wiring, it’s crucial to prioritize safety to avoid any accidents or injuries. First, we need to turn off the power supply to the doorbell system at the circuit breaker. This prevents electric shock. Next, let’s use a voltage tester to confirm there’s no voltage in the wires, especially the red wire, before handling them. It’s also wise to wear insulated gloves for added protection against accidental contact with live wires during our inspection. Keeping our workspace dry and uncluttered minimizes risks, too. Finally, we should ascertain all necessary tools and materials are at hand. This prevents leaving wires exposed for any longer than necessary, further enhancing our safety first approach. Using specialized tools for specific models can also help ensure you handle your wiring correctly and safely.
Documenting Your Doorbell Wiring Setup
Documenting your doorbell wiring setup is essential to guarantee a smooth installation or troubleshooting process later on. First, we’ll locate the transformer, often found in a utility closet. Here, we should identify the red and black wires, which provide power and measure their voltage with a multimeter; they need to deliver the correct 22VAC for function. Next, we’ll document the color and configuration of all wires connected to the chime and buttons, noting which pairs go to the front and rear terminals. Inspect the chime for any extra wires, like yellow and green, indicating bypassed connections. Finally, let’s take photos of the entire wiring setup, ensuring all details are easily accessible for future reference. It’s important to confirm the transformer’s voltage compatibility with your doorbell specifications to prevent operational issues.
Next Steps: Ensuring Your Doorbell System Functions Correctly
To guarantee our doorbell system functions correctly, it’s essential that we follow a systematic approach. First, we should turn off all power to the system for safety. Next, we identify and label the wires connected to the chime unit, noting the front and rear connections. Using a multimeter, we’ll test for voltage at the transformer and chime, ensuring it’s within the standard 16-24VAC range. We must also check for any loose or disconnected wires, especially from the push buttons to the chime. If we find any, we reconnect them according to the manufacturer’s wiring diagram. This careful attention to detail will help us maintain a stable and operational doorbell system. Additionally, verifying the power requirements of your doorbell model is crucial before installation to ensure compatibility and optimal performance.
Frequently Asked Questions
How to Identify Doorbell Wires?
To identify doorbell wires during installation, we should look for specific wiring colors. Typically, red indicates the transformer, while white and black represent the front and rear buttons. Let’s document everything for future reference.
How to Trace a Doorbell Transformer?
To trace a doorbell transformer, we’ll locate its location first, check doorbell voltage with a multimeter, and if needed, use a wire tracer to follow wires to the doorbell chime and button effectively.
What Is the Trans Wire on a Doorbell?
The trans wire’s function is to supply low voltage power to our doorbell system. When troubleshooting, we should look for a typically red wire connected to the transformer to guarantee everything’s functioning properly.
How Do I Know What My Doorbell Transformer Is?
To know our doorbell transformer, we should check its output voltage, commonly marked on the unit. Remember, electrical safety’s essential—if unsure, we can use a multimeter to confirm functionality before proceeding.